How to install a Tonneau Cover
 Rob Wilson
Installing a tonneau cover is a DIY friendly activity that will improve many aspects of your ute. Understandably, many people want to know how hard they are to install. There’s nothing worse than buying something online, to then spend hours on the phone to the company trying to work through the installation.
Our brand of tonneau covers have been chosen for their superior quality and performance, but also because of their user friendly design and installation. Being an online business, we need to have confidence our customers can install our tonneau covers with ease.
In this article, we’ll break down the installation for each of the main categories of tonneau covers. We’ll advise what tools you’ll need, how long it will take, and the basic instructions to install a tonneau cover.
How to install a Bunji Tonneau Cover
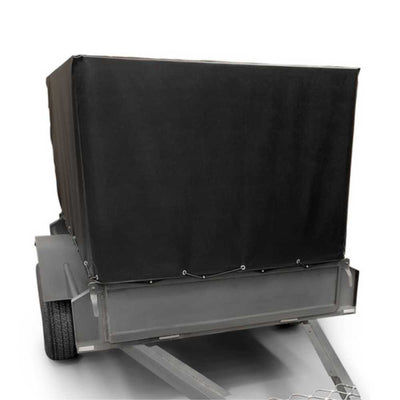
Bunji and rope tonneau covers are the original style that many makes still use today. They’re user and budget friendly, and have proven themselves over many decades. So what are they like to install?
The first thing that determines the difficulty of installing a tonneau cover is whether there is any hardware on the ute from the factory. Many makes and models come with a tonneau cover as factory standard, and this means hardware like bungee buttons will already be fixed to the vehicle. After years of service, the fixed hardware often remains, but it is the tonneau cover you need to replace. In this scenario, we will supply the cover with the loops pre-installed to fit the factory placement. This means it’s a very simple removal and replacement of your tonneau.
For ute with a blank tub, replacement of hardware, or changing tonneau style, there’s a little more work to install a tonneau cover.
Tools Required
- Safety glasses
- Rivet gun
- Drill
- Torch
- Tape measure
- Marking pen or pencil
- Silicone
General Process
This process will vary depending on what hardware you already have installed.
- Install the aluminium rope track or channel
This is the main fixed element that secures your tonneau cover to the tub. It will need to be pop-riveted into the front of the tub under the rear window.
2. Install the tonneau support bar brackets
These two brackets secure the support bar, which provides tension to the tonneau cover so water doesn’t pool and stretch your cover. They will need to be pop-riveted into place.
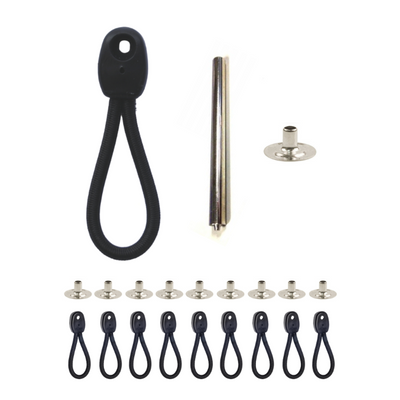
3. Installing bungee buttons or hooks
The bungee buttons will need to be installed to line up with the pre-installed loops on your tonneau cover. Once aligned, you will follow the instructions to set the buttons at determined heights from the instructions, then pop-rivet them into place.
How to install a Clip On Tonneau Cover
Clip on tonneau covers are the modern, clean looking option seen on many new utes. They’re more user friendly enabling quick access to the tub compared to a bunji cover. But how easy are they to install?
Once again, it will depend on the hardware installed on the ute. In most scenario’s, our Tonneau Covers won’t fit factory rails that are installed on your ute if you’re replacing just the cover, they will need to be replaced. But the good things is you can use the existing rivet holes in the side of your tub.
Tools Required
- Safety glasses
- Rivet gun
- Drill
- 4mm drill bit
- Tape measure
- Marking pen or pencil
- Silicone
General Process
This process will vary depending on what hardware you already have installed.
1. Install the aluminium rope track or channelThis is the main fixed element that secures your tonneau cover to the tub. It will need to be pop-riveted into the front of the tub under the rear window.
2. Attach the side rails
Following a similar process to the rope channel, you will drill and rivet the side rails to the side of your tub.
3. Install the tonneau support bar brackets
These two brackets secure the support bar, which provides tension to the tonneau cover so water doesn’t pool and stretch your cover. They will need to be pop-riveted into place.
4. Fit the tonneau cover
How to install a No Dill Clip On Tonneau Cover
No Drill Tonneau Covers are the premium, user friendly choice for ute owners. They’re the easiest to install, within the hour and don’t require any drilling into your new ute. No Drill Tonneau Covers use a clamping system instead of rivets to secure the channels to your ute. They also come with very detailed instructions.
Tools Required
- Safety gear
- 6-in-1 Multi tool (supplied)
- Tape measure
General Process
-
Assemble clamps
-
Attach the side rails using clamps
-
Attach the support bar brackets using clamps
-
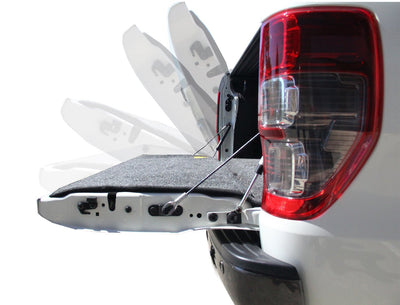
Attach the tailgate channel
Remove the tailgate panel via the screws, then insert cage nuts which will be used to fix the rear channel to. Replace the panel, then place the tailgate rail over the top. Use supplied bolts to secure everything together.
4. Fit the tonneau cover
Fit the tonneau cover from the front, rear and sides. Then adjust the tension of the tonneau cover by move the support bar brackets up or down.
Leave a comment